Table of Contents
Tired of shelling out cash for a gym membership you barely use? Or maybe the commute just kills your motivation before you even get there. Building a home gym sounds great, but the price tag on fancy equipment can make your eyes water faster than a tough cardio session. What if I told you there’s a way to get a solid workout setup without emptying your wallet?
Why Make Gym Equipment You Can Make at Home?
Why Make Gym Equipment You Can Make at Home?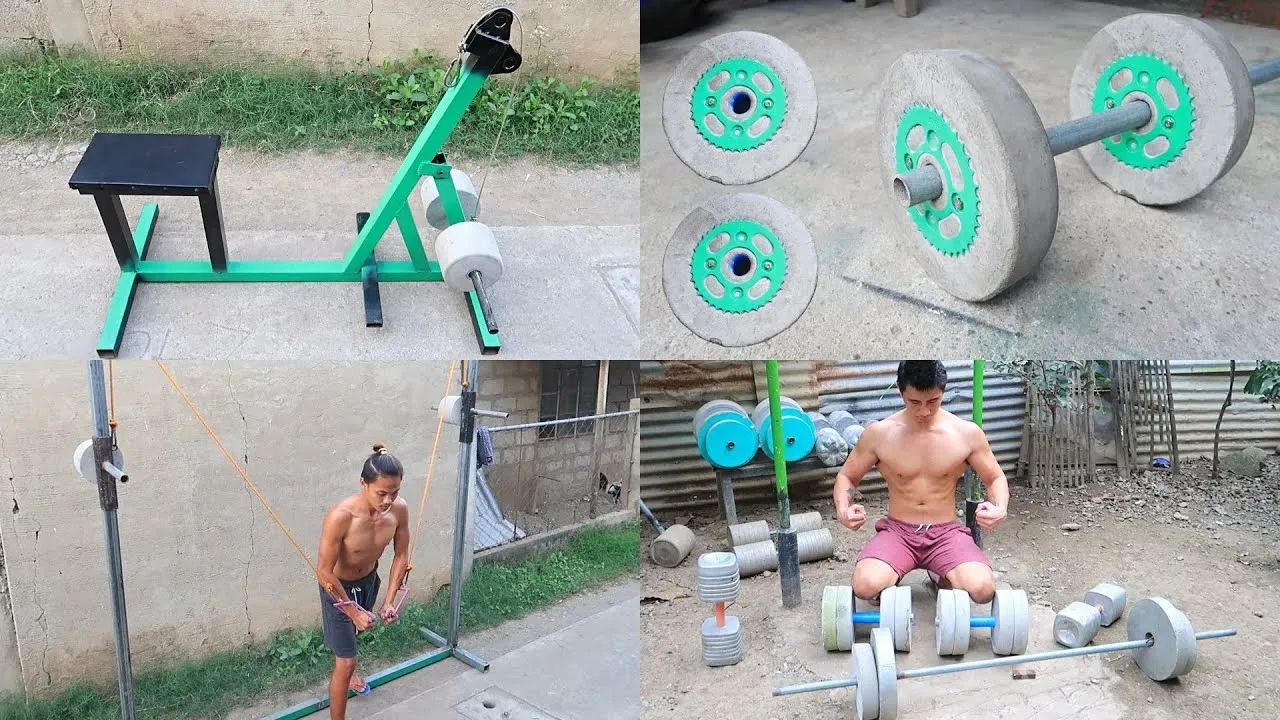
So, why bother with the sawdust and potential splinters? Why make gym equipment you can make at home instead of just, you know, buying it? Look, let's be real. Gym memberships bleed you dry, and fancy home gym setups cost more than a decent used car. Building your own stuff cuts out the middleman and the insane markups. You get exactly what you need, tailored to your space and your specific goals, not some generic piece of shiny metal designed for a commercial gym floor. Plus, there's a certain satisfaction in lifting weights you literally built yourself. It's like, "Yeah, I'm strong, and I'm also handy. Beat that." It puts you in control of your fitness journey, not beholden to gym hours or equipment availability.
Essential DIY Gym Equipment You Can Make at Home: The Basics
Essential DIY Gym Equipment You Can Make at Home: The Basics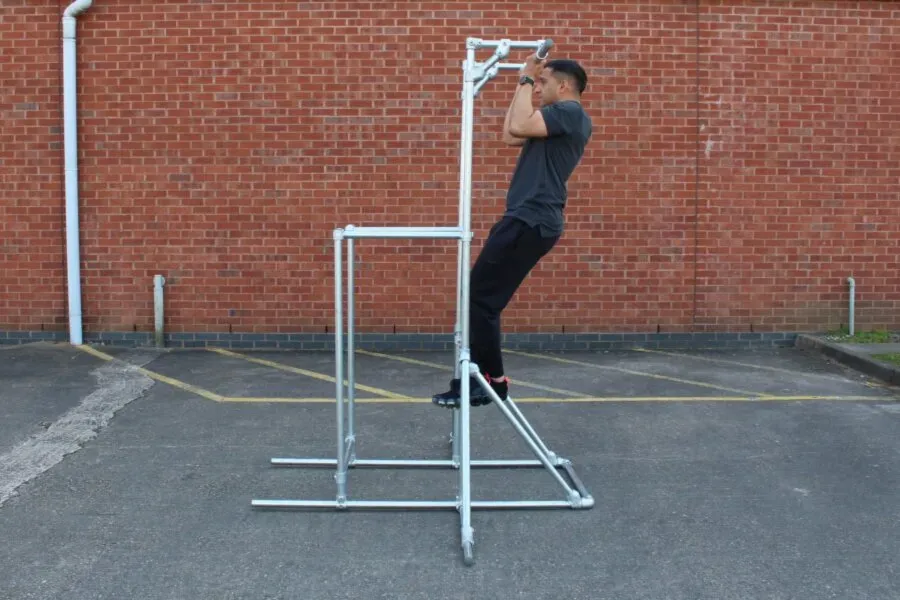
Start with Simple Weights
so you're ready to ditch the crowded gym floor and build your own fitness fortress. Where do you even start with gym equipment you can make at home? Let's talk weights. You don't need fancy chrome dumbbells right away. Concrete weights are surprisingly effective and dirt cheap. Grab some empty plastic containers – old milk jugs, buckets, or even sturdy plastic bottles. Mix up some concrete, pour it in, stick a piece of pipe or rebar in the center for a handle (make sure it's centered and stable!), and let it cure. Boom. Instant, heavy objects for lifting. You can make different sizes by using different containers. Just remember concrete is heavy; a small bucket fills up fast.
Resistance and Pull-Ups on the Cheap
Beyond lifting heavy things, resistance is key. While buying resistance bands is pretty affordable, you can also rig up some effective resistance tools. Old bicycle inner tubes, if you have any lying around, can work in a pinch, though their resistance isn't always consistent. For pull-ups, if you have a sturdy doorframe, a DIY bar is possible. You can use a strong metal pipe and some secure mounting brackets, but this requires careful measurement and installation to avoid ripping down your doorframe (and yourself). A simpler method might involve finding a sturdy tree branch or a strong beam in your garage or basement if you have one.
- **Concrete Weights:** Empty plastic containers (milk jugs, buckets), concrete mix, water, sturdy pipe/rebar for handle.
- **Pull-Up Bar (Doorway):** Strong metal pipe, heavy-duty mounting brackets, screws (check wall type!), level, drill.
- **Resistance Bands:** (DIY less practical, but) Old bicycle inner tubes, heavy-duty elastic cord.
Groundwork and Bodyweight Boosters
Don't underestimate bodyweight exercises, but sometimes you need a little help or variation. Parallettes, those low bars used for dips and handstands, are fantastic. You can make these easily with PVC pipe or even sturdy wood. Just cut the pieces to length, use elbows and tees for PVC, or wood glue and screws for wood. Ensure they are stable and can bear your weight. For floor work, an old blanket or rug works as a makeshift mat. And if you need a slightly elevated surface for things like step-ups or incline push-ups, a sturdy wooden crate or even stacked, secured textbooks can serve the purpose for your gym equipment you can make at home.
Beyond the Basics: More DIY Gym Equipment for Your Home
Beyond the Basics: More DIY Gym Equipment for Your Home
Level Up with Sandbags and Medicine Balls
you've mastered the concrete weights and are doing pull-ups like a champ. Ready to get weird with your training? Sandbags are brutally effective for functional strength. Grab a durable duffel bag or military surplus bag. Fill heavy-duty garbage bags or contractor bags with sand, duct tape them shut tight, and stuff them into the duffel. The shifting weight forces your stabilizer muscles to work overtime. It’s less about the static lift and more about wrestling a floppy, heavy beast. You can make them different weights by adding or removing sandbags. Just make sure the outer bag is tough enough not to explode mid-squat.
For medicine balls, you can modify an old basketball or soccer ball. Cut a small slit, fill it with sand or pebbles (use a funnel, trust me), then seal the slit with heavy-duty tape or even a patch and strong adhesive. These are great for core work, throwing exercises, and adding resistance to bodyweight moves. They won't bounce like store-bought ones, which frankly, is safer indoors anyway. This kind of versatile gym equipment you can make at home adds a whole new dimension to your workouts without requiring a second mortgage.
- **Sandbag:** Durable duffel bag, heavy-duty garbage/contractor bags, sand, duct tape.
- **Medicine Ball:** Old sports ball (basketball/soccer), sand or pebbles, funnel, heavy-duty tape/patch.
- **Weight Sled (Simple):** Old tire, sturdy rope, harness or sturdy belt.
Build a Simple Weight Sled
Want to torch your legs and build explosive power? A weight sled is a killer tool. You can make a basic version with an old tire. Find a large, sturdy tire (maybe from a truck or tractor if you can get one). Attach a heavy-duty rope to one side using a strong bolt and washer, or loop it through the center if the tire allows. Attach the other end of the rope to a harness you wear or even just loop it around a sturdy belt. Dragging this thing back and forth across a patch of grass or pavement is humbling and effective. You can add weight by placing rocks, sandbags, or even those concrete weights you made earlier inside the tire's center. It’s primitive, sure, but it works. This DIY gym equipment you can make at home proves you don't need fancy contraptions to get results.
Craft Your Own Kettlebell
Kettlebells are fantastic for dynamic movements, swings, and building grip strength. While slightly trickier than concrete weights, you can fashion a usable version. A popular method involves using a sturdy bucket or jug and filling it with concrete, inserting a strong, curved handle (like a piece of rebar bent into a 'U' or a thick pipe with a handle welded on). The key is getting the handle secure and comfortable. Another approach uses a heavy sphere (like a bowling ball or a large, dense rock) and attaching a handle securely with strong epoxy and possibly bolts. Getting the weight distribution right is crucial here, as a poorly balanced kettlebell is just asking for an injury. This is one piece of gym equipment you can make at home that requires a bit more precision and material quality.
Safety First: Tips When Making Gym Equipment You Can Make at Home
Safety First: Tips When Making Gym Equipment You Can Make at Home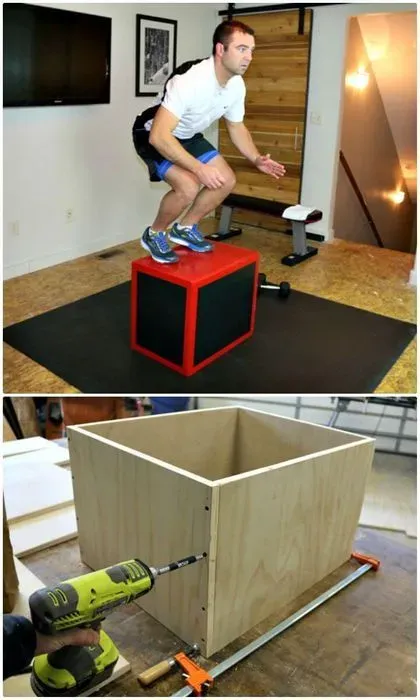
Don't Skimp on Materials and Design
Alright, so you've got your concrete weights curing and your PVC parallettes looking sharp. Before you load them up or jump on them, let's talk survival. Making gym equipment you can make at home is awesome, but building death traps? Not so much. The absolute first rule: use materials that are actually strong enough for the job. That piece of scrap wood might look okay, but is it rated to hold your weight during a dip? Probably not. Use new, quality materials whenever possible – structural lumber, schedule 40 PVC or thicker, heavy-duty bolts and brackets. Overbuild it. If you think two screws are enough, use four. If the design feels a little wobbly, it is. Go back to the drawing board. A few extra bucks at the hardware store beats a trip to the emergency room any day.
Test Everything Like Your Life Depends On It (Because It Might)
You've finished your masterpiece of DIY gym equipment. Great. Now resist the urge to immediately load 200 pounds onto it or hang upside down. Test it gradually. For weights, lift them slowly, check the handles for any give or cracks. For bodyweight equipment like pull-up bars or parallettes, start by putting a fraction of your weight on them. Lean on the parallettes. Hang from the pull-up bar with just your feet touching the floor. Then hang with full bodyweight, but keep your feet ready to drop. Bounce on it gently. Look for bending, cracking, or shifting. If it groans, creaks, or looks like it's about to fail, it needs reinforcement or a complete redesign. Seriously, don't be a hero; be smart.
- Check wood for knots or cracks.
- Ensure metal pipes are thick-walled.
- Use locking nuts or thread locker on bolts.
- Smooth out rough edges or splinters.
- Verify weight ratings of ropes or chains.
Regular Checks and Knowing Your Limits
Building it safe is step one. Keeping it safe is ongoing. Your homemade gym equipment isn't going to have a maintenance crew. That's on you. Before every single workout, give your DIY gear a quick once-over. Look for new cracks in concrete, loosening bolts, fraying ropes, or splintering wood. Temperature changes and repeated stress will wear things down. Fix issues immediately, or retire the piece if it's too far gone. Also, know the limits of your equipment and, honestly, your own limits. That PVC parallette set might be great for dips, but attempting a weighted handstand push-up on it might be pushing your luck. Be realistic about what your gym equipment you can make at home can handle.
Starting Your Home Gym Journey with DIY Equipment
Starting Your Home Gym Journey with DIY Equipment
Taking the First Step
So, you're sold on the idea of building your own fitness space using gym equipment you can make at home. The biggest hurdle isn't the concrete mixing or the saw cuts; it's actually starting. Don't feel like you need to build a fully equipped commercial gym overnight. Begin small. Pick one or two projects that address your current fitness needs. Maybe it's those concrete weights because you want to start lifting, or perhaps it's parallettes for bodyweight mastery. The point is to pick something achievable, build it, and start using it. That initial success is a powerful motivator. It proves you don't need a fancy membership or expensive gear to get moving.
Planning Your DIY Arsenal
Before you dive headfirst into a pile of PVC pipes and sand, take a minute to plan. What kind of workouts do you actually enjoy or want to do? Are you into lifting heavy, bodyweight strength, or maybe more functional movements? Your goals should dictate the gym equipment you can make at home. If squats are your jam, maybe focus on sturdy weight options. If you dream of handstands, those parallettes are a good bet. Look at your space too. How much room do you have? A small apartment might be better suited for resistance bands and a homemade medicine ball than a massive tire sled. Sketch things out, measure twice, cut once, and think about progression. What will you need as you get stronger?
- Start Simple: Concrete weights, parallettes, or a basic pull-up bar (if space and structure allow).
- Match Equipment to Goals: Build what supports your chosen exercises.
- Assess Your Space: Don't build gear you can't fit or safely use.
- Consider Progression: How will your needs change as you get fitter?
Consistency Beats Complexity
You've built your first pieces of gym equipment you can make at home. Awesome. Now the real work begins: using it consistently. A garage full of impressive DIY gear won't get you results if it just gathers dust. Schedule your workouts like any other important appointment. Use the equipment you built. As you get fitter and more comfortable, you can always add more pieces to your collection, tackling more complex builds like the sandbag or kettlebell. The beauty of a DIY gym is that it evolves with you. It's a continuous project, just like fitness itself. Stick with it, keep building (both muscle and gear), and watch the progress happen.
Your DIY Home Gym Awaits
So, there you have it. Building gym equipment you can make at home isn't just a way to save money; it's a practical approach to fitness that puts you in control. You've seen how simple materials can become effective tools for strength and conditioning. It takes a bit of effort, sure, but the result is a personalized workout space that fits your needs and your budget. Stop waiting for the perfect gym and start building your own today. Your muscles (and your wallet) will thank you.