Table of Contents
Tired of crowded gyms and hefty membership fees? What if I told you that you could build a killer home gym without breaking the bank? Forget fancy machines; we're diving into the world of DIY fitness! This isn't just about saving money; it's about getting creative and making your workout space truly yours. We'll start with everyday objects you probably already have lying around, transforming them into effective workout tools. Then, we'll explore some simple projects for building more specialized equipment. Think pull-up bars, weights, and even a squat rack, all made with your own two hands. This guide will show you exactly how to make home gym equipment that's both functional and fun. It will also give you some workout routines to get you started. So, if you're ready to ditch the gym and take control of your fitness journey, keep reading, you're in the right place!
Starting Simple: Household Items as Gym Equipment
Starting Simple: Household Items as Gym Equipment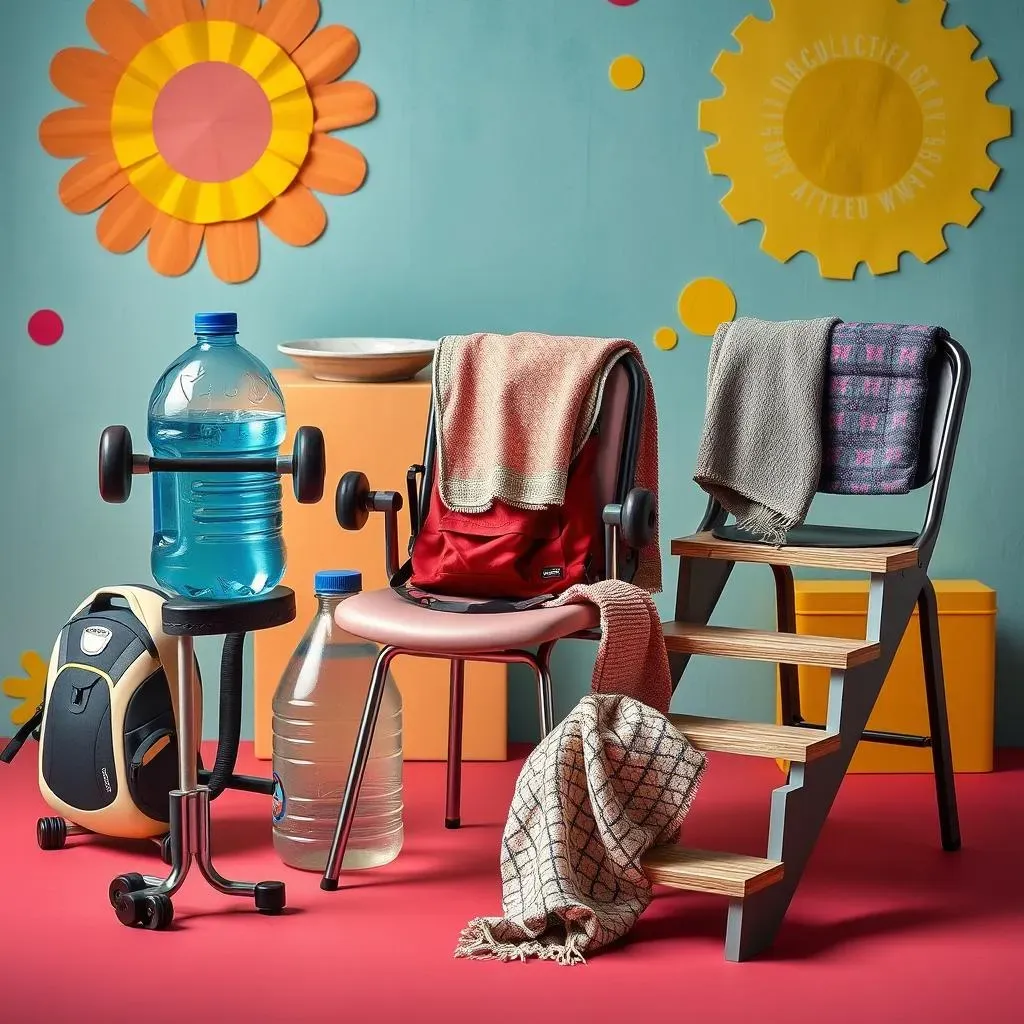
Alright, let's get real. You don't need a fancy gym membership to start getting fit. Seriously, your house is a goldmine of workout equipment just waiting to be discovered. Think about it: those jugs of water or laundry detergent? Boom, instant weights! Fill them up, and you have adjustable dumbbells. Got a sturdy backpack? Load it up with books or canned goods, and you've got a weighted vest for squats or lunges. Even your towels are useful. Twist them up and you have a great tool for stretching or resistance exercises. It's like a treasure hunt, but the prize is a fitter you!
Don't underestimate the power of simple things. A sturdy chair or stool can be your best friend for step-ups, triceps dips, or incline push-ups. Stairs are perfect for cardio bursts and calf raises. And if you've got some open wall space, you can do some wall sits or handstand practice. I remember when I first started, I used a couple of big paint buckets as weights, and they worked a charm. It’s all about getting creative and making do with what you have. You might be surprised at how effective these everyday things can be.
Household Item | Use |
|---|---|
Water/Detergent Jugs | Adjustable weights |
Backpack | Weighted vest |
Towels | Stretching, resistance |
Chair/Stool | Step-ups, dips |
Stairs | Cardio, calf raises |
Essential DIY Gym Equipment: Pullup Bars, Weights, and More
Essential DIY Gym Equipment: Pullup Bars, Weights, and More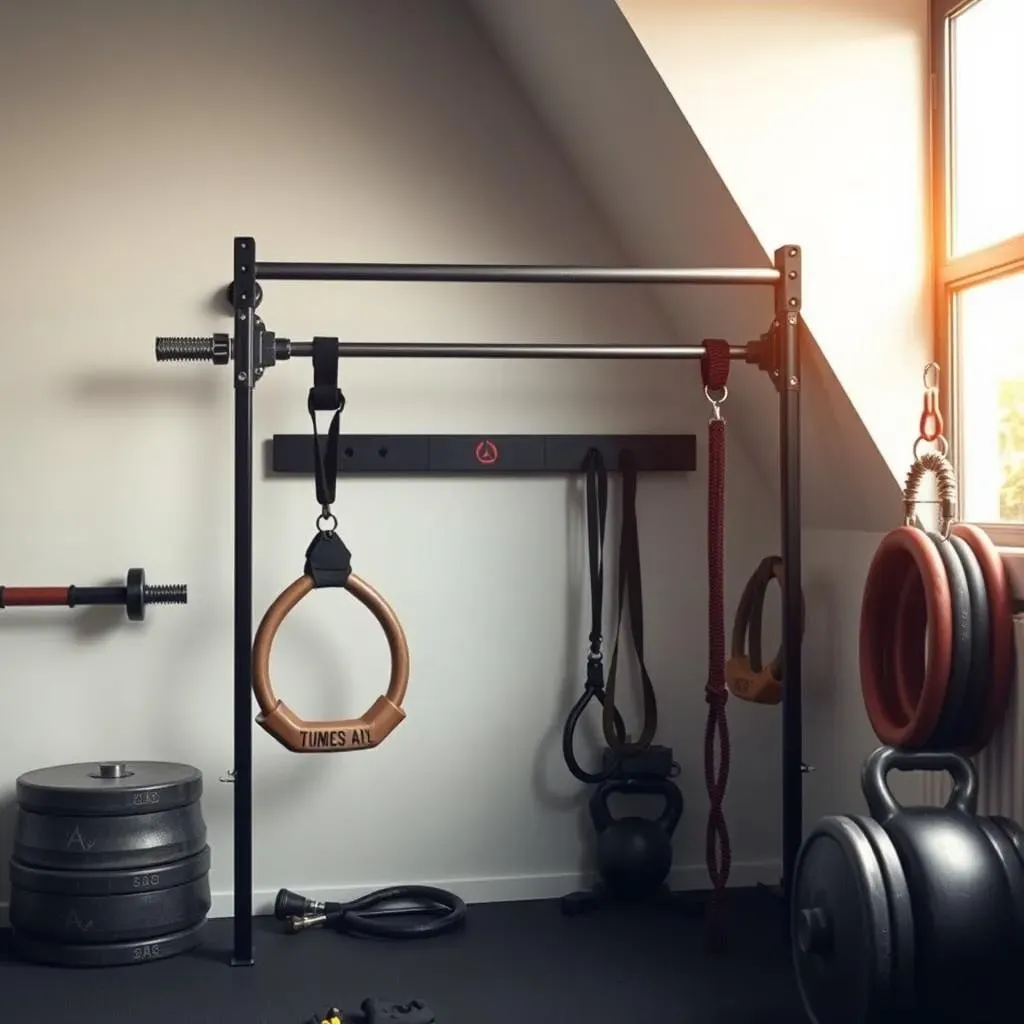
so you've mastered using your couch as a plyo box, what's next? It’s time to level up and build some core pieces for your home gym. First up, the pull-up bar. This isn't just for show; it's a powerhouse for upper body strength. You can buy a doorway pull-up bar, or get creative. I've seen people use sturdy pipes attached to a door frame, or even a thick tree branch in the backyard. Just make sure it's secure before you start swinging! Next, let’s talk about weights. If you're tired of lugging around water jugs, consider making some concrete weights. You can pour concrete into buckets or molds, adding a metal pipe as a handle. It’s a bit messy but so rewarding. You can also make sandbags with old duffel bags and some heavy-duty filler. These are fantastic for squats, lunges, and even some dynamic core work.
Don't forget about the smaller stuff that can make a big impact. A good yoga mat is essential for floor exercises and stretching. I also highly recommend gymnastic rings. You can hang them from your pull-up bar or a sturdy tree. They add a whole new dimension to your workouts, challenging your stability and strength. And if you're feeling extra ambitious, a kettlebell is a fantastic addition. You can make one by filling a sturdy bag or ball with sand or concrete and adding a handle. Seriously, the possibilities are endless. It's like a playground for grown-ups, but instead of slides and swings, we have pull-up bars and weights. And the best part? You built it yourself! I remember the first time I did a pull-up on my DIY bar, it was a feeling of pure accomplishment.
Equipment | DIY Options | Benefits |
|---|---|---|
Pull-up Bar | Doorway bar, pipes, tree branch | Upper body strength, back muscles |
Weights | Concrete in buckets, sandbags | Strength training, muscle growth |
Yoga Mat | Any mat will do | Floor exercises, stretching |
Gymnastic Rings | Hanging from bar or tree | Stability, upper body strength |
Kettlebell | Bag with sand/concrete, handle | Full body workout, dynamic moves |
Advanced Home Gym Equipment: Squat Racks and Barbells
Advanced Home Gym Equipment: Squat Racks and Barbells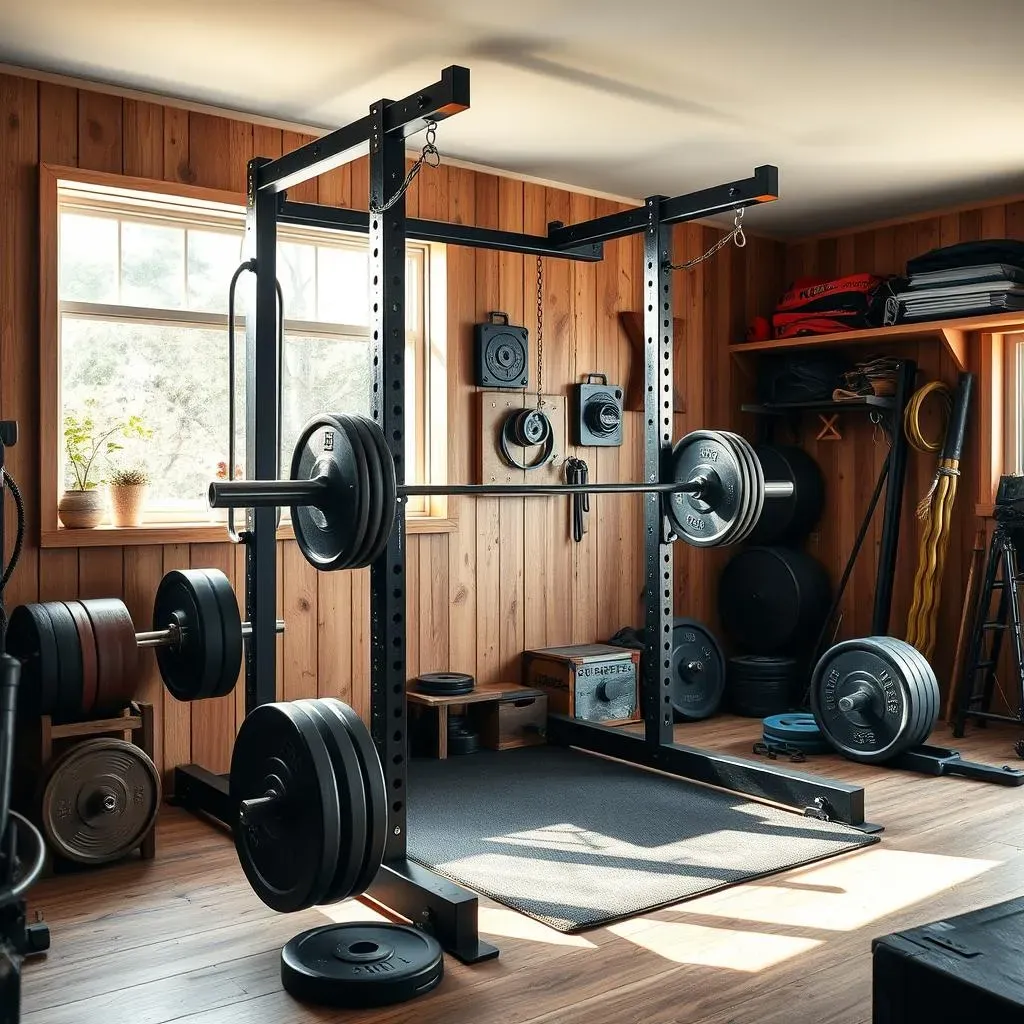
Building Your Own Beast Mode Station
so you're ready to go from home gym hero to absolute beast? Then it's time to talk about the big guns: squat racks and barbells. These aren't your average DIY projects, but if you're serious about strength training, they’re game-changers. A squat rack is the foundation for so many exercises, not just squats. Think bench presses, overhead presses, and even pull-ups if you add a bar at the top. Building one yourself can save you a ton of money. I've seen some impressive DIY racks made from wood, metal pipes, or even repurposed scaffolding. Just make sure you're confident in your construction skills or get help from someone who knows what they're doing. Safety first, always!
Crafting Your Own Barbell
Now, let's talk about barbells. You can buy one, but where's the fun in that? A simple barbell can be made from a sturdy steel pipe. I've seen people use a thick metal pipe and secure weights to it with clamps or collars. You can also make a more basic version by using a wooden dowel and attaching weights to it with rope or duct tape. It might not be pretty, but it gets the job done. Remember, the goal here isn't to have the fanciest equipment; it's to build something functional and effective. I remember the first time I tried a heavy lift on my homemade barbell, it was a mix of terror and excitement, but it was an amazing workout!
Equipment | DIY Materials | Tips |
|---|---|---|
Squat Rack | Wood, metal pipes, scaffolding | Ensure stability, get help if needed |
Barbell | Steel pipe, clamps, wooden dowel, rope | Secure weights tightly, start with lighter loads |
Safety and Customization
Before you start throwing around heavy weight, make sure your setup is safe. Double-check all connections, use safety pins or collars, and don't try to lift more than you can handle. Also, don't be afraid to customize your equipment. Add padding to your bench, adjust the height of your rack, or experiment with different grip options. The beauty of building your own equipment is that you can adapt it to your own specific needs and preferences. It’s like having a gym that was tailor-made just for you. I think the coolest part about DIY stuff is that you can always tweak it and make it better. It's never really "done," you know?
Creating a Workout Routine with Your Home Gym Equipment
Creating a Workout Routine with Your Home Gym Equipment
Getting Started: Planning Your Workouts
so you've got your DIY gym all set up, that's awesome! Now, let's talk about making the most of it. You can't just walk in and start throwing weights around randomly. You need a plan. Think about it like a recipe; you wouldn't just throw ingredients into a pot without some idea of what you're making, right? Same goes for your workouts. Start by figuring out your goals. Do you want to build muscle, lose weight, or just get healthier? Knowing this will help you choose the right exercises. I always tell people to start slow, especially if you're new to this. Don't try to do everything at once. It’s like trying to read a whole book in one sitting. You'll burn out fast.
Next, think about what muscle groups you want to work each day. A common approach is to split your workouts into upper body, lower body, and core days. For example, Mondays could be for chest, shoulders, and triceps; Wednesdays for legs and glutes; and Fridays for back, biceps, and core. Make sure you're hitting all the major muscle groups each week. Don't forget to include rest days. Your body needs time to recover and repair itself. I usually aim for 2-3 workout sessions per week, with plenty of rest in between. It's all about finding what works best for you, and being consistent. That's the secret sauce to getting results.
Workout Split | Muscle Groups | Example Exercises |
|---|---|---|
Upper Body | Chest, Shoulders, Triceps | Push-ups, Overhead Presses, Dips |
Lower Body | Legs, Glutes | Squats, Lunges, Calf Raises |
Core | Abs, Back | Planks, Crunches, Back Extensions |
Sample Workout and Resources
Let's get into the nitty-gritty. A sample workout could start with a 5-10 minute warm-up, such as jumping jacks, arm circles, and leg swings. Then, move into your main exercises. For your upper body, you could do 3 sets of 8-12 reps of push-ups, followed by overhead presses with your DIY weights, and triceps dips on a chair or stool. For legs, try squats, lunges, and calf raises using your backpack as a weight. Core work can include planks, crunches, and Russian twists with your water jugs. Remember to focus on proper form over speed or weight. Quality over quantity is always the way to go. And always finish with a cool-down and some light stretching.
If you're feeling lost, don't worry, there are tons of resources out there. You can find free workout routines on YouTube or fitness apps. Some apps even offer personalized training plans. I found a great community on social media; it's always inspiring to see what others are doing and get new ideas. Also, consider online coaching if you want more guidance. A coach can help you create a workout plan that's tailored to your needs and goals. The key is to stay motivated and keep learning. Fitness is a journey, not a destination. As long as you're moving and making progress, you're doing great. It's all about the process, and enjoying the ride.
- Warm-up: 5-10 minutes of light cardio
- Main Exercises: 3 sets of 8-12 reps per exercise
- Cool-down: 5-10 minutes of stretching
- Resources: YouTube, Fitness Apps, Online Coaching
Your Home Gym, Your Rules
Building your own home gym is not just about saving money; it's about taking control of your fitness journey. You've seen how simple household items can become powerful tools and how you can create more advanced equipment with some basic DIY skills. The key is to start where you are, use what you have, and get creative. Remember, consistency is more important than perfection. So, get out there, build your space, and make it a place that inspires you to move. Your fitness goals are within reach, and you have the power to achieve them, one DIY project at a time. Now go and get your sweat on!