Table of Contents
Tired of shelling out cash for a crowded gym? Or maybe that squat rack you've been eyeing costs more than your first car? Building a home gym can feel like a financial mountain, but it doesn't have to be. There's a solid alternative: learning how to make your own gym equipment at home. It’s not about duct-taping milk jugs to broomsticks (though we won't judge your hustle). It's about smart, often simple, construction that saves serious money and lets you tailor your setup precisely to your needs and space.
Why Build Your Own Gym Equipment? Saving Cash and Customizing Your Space
Why Build Your Own Gym Equipment? Saving Cash and Customizing Your Space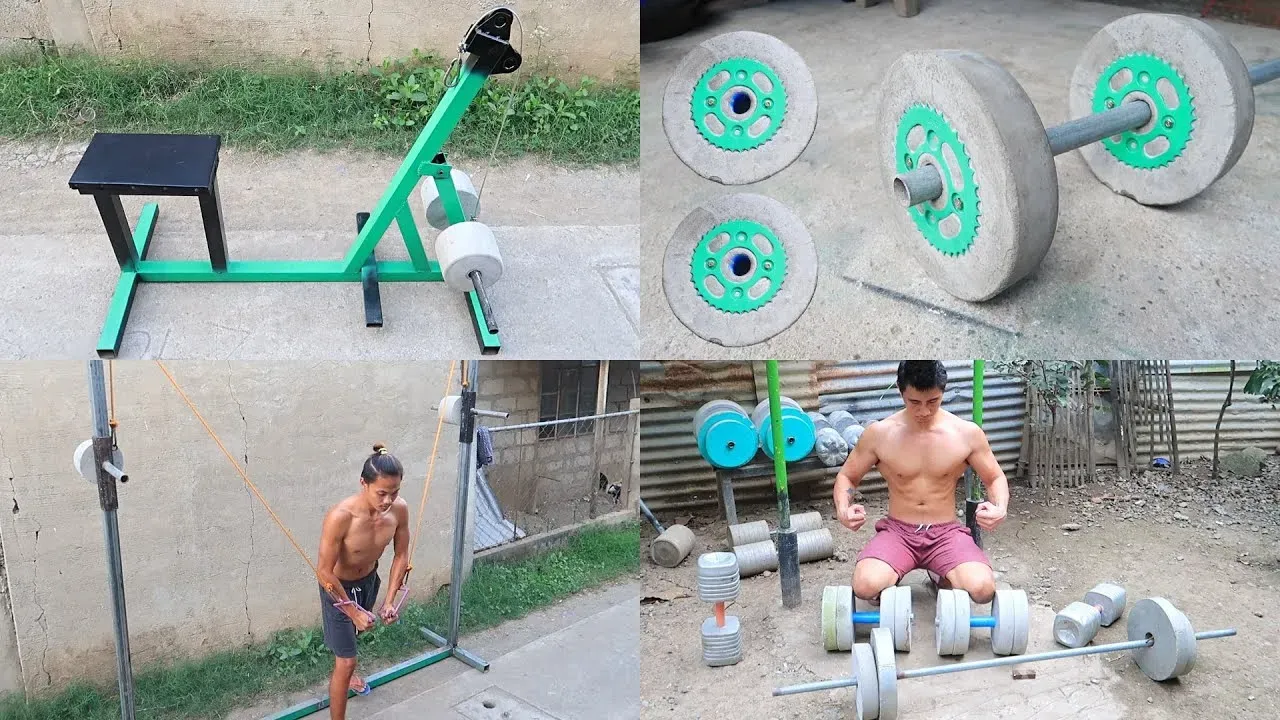
Let's be real. Gym memberships add up, and buying brand-new, commercial-grade equipment? That can feel like taking out a second mortgage. But what if you could get the functionality you need without draining your bank account? That’s exactly why building your own gym equipment is such a game-changer. You save serious cash, often hundreds or even thousands of dollars compared to retail prices. Beyond the financial relief, you get exactly what you need for your specific workouts and the unique dimensions of your space. No more trying to fit a bulky, standard bench into a tight corner. Learning Why Build Your Own Gym Equipment? Saving Cash and Customizing Your Space means you build equipment that fits *your* life, not the other way around.
Simple Starts: How to Make Your Own Gym Equipment at Home with Basic Materials
Simple Starts: How to Make Your Own Gym Equipment at Home with Basic Materials
Building Your First Weights: Simple and Cheap Options
Alright, so you're ready to ditch the gym fees but still need something heavy to lift? You don't need a welding torch or a workshop full of power tools just yet. Many effective pieces of gym equipment can be made with stuff you likely have lying around or can get for peanuts at a hardware store. We're talking sand, concrete, old bags, buckets, and some sturdy pipe. Learning how to make your own gym equipment at home starts with these fundamentals. It's about function over fancy finishes at this stage.
DIY Dumbbells and Kettlebells on a Budget
One of the easiest ways to add resistance is by making your own weights. Concrete is your friend here. Grab some cheap buckets or molds, bags of concrete mix, and maybe some rebar or pipe for handles. Mix the concrete, pour it into your molds with the handles secured, and let it cure. You can make dumbbells, kettlebells, or even weight plates this way. They won't look pretty, but they lift just fine. Sandbags are another incredibly versatile option. Fill durable bags (like old duffel bags or military surplus bags) with sand. Seal them tight. Boom. You have a weight that's awkward, challenging, and perfect for carries, squats, or throws. This is pure, raw, functional fitness.
What basic materials should you consider for your first DIY projects?
- Concrete mix and molds (buckets, old containers)
- Sand and durable bags (duffel bags, feed sacks)
- PVC pipe or metal conduit for handles or frames
- Wood scraps and screws for simple platforms or blocks
- Water jugs or bottles (filled with water or sand)
Basic Bodyweight Boosters: Pull-Up Bars and Parallettes
Bodyweight training is powerful, but sometimes you need a little help accessing certain movements. A simple doorway pull-up bar can be bought relatively cheaply, but you can also rig a sturdy pipe between two secure points if you're handy and confident in your structural knowledge (be smart and safe!). For push-ups, dips, and handstands, parallettes are fantastic. You can build a solid pair quickly using PVC pipe and fittings or even just some sturdy wood cut to length. These projects are straightforward, require few tools, and immediately open up a host of new exercises. It’s a practical step in figuring out how to make your own gym equipment at home that directly impacts your training.
Taking on Bigger Builds: Advanced DIY Home Gym Projects
Taking on Bigger Builds: Advanced DIY Home Gym Projects
so you've mastered the concrete dumbbells and maybe even rigged up some sturdy parallettes. You're feeling confident, you've saved a few bucks, and now you're looking at that empty space in your garage or basement and thinking, "What's next?" This is where we move intoTaking on Bigger Builds: Advanced DIY Home Gym Projects. We're talking about pieces that form the backbone of a serious home gym: squat racks, weight benches, maybe even a basic cable system. These projects require a bit more commitment – more materials like structural lumber or steel tubing, more serious tools like a drill press or maybe even a welder (or a friend who has one), and definitely more careful planning. But the payoff is huge. You get equipment that can handle heavier weights and more complex movements, bringing your home gym closer to a full commercial setup without the crippling price tag.
Beyond the Build: Safety and Maintenance for Your Homemade Gear
Beyond the Build: Safety and Maintenance for Your Homemade Gear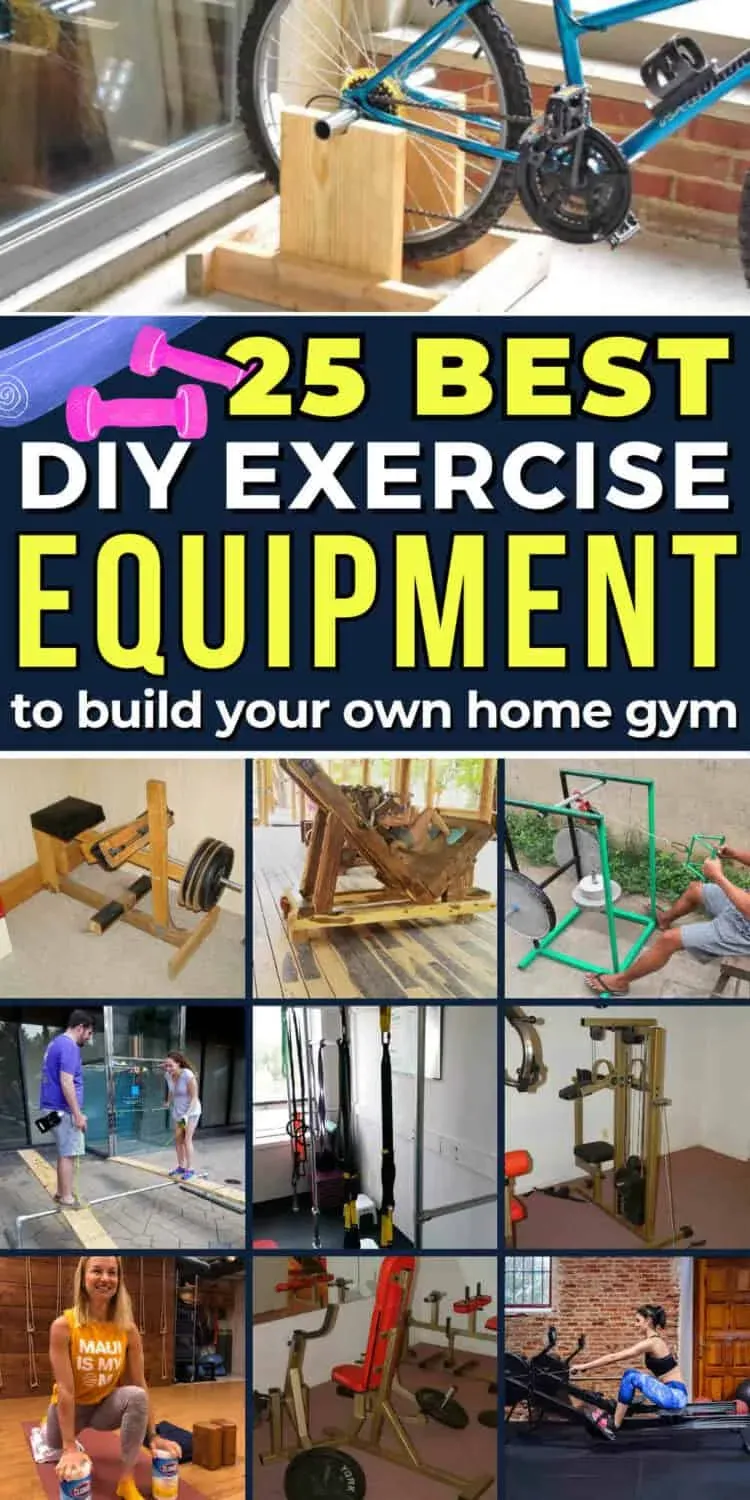
Checking Your Work: Initial Safety Inspections
Alright, you've put in the hours, the blood (hopefully not literally), sweat, and maybe a few tears. Your homemade squat rack or concrete dumbbells are sitting there, looking ready for action. Before you load up a bar or swing that kettlebell, you absolutely must check your work. This isn't the time to admire your craftsmanship from afar. Get up close. Wiggle everything. Pull on joints. Look for cracks in concrete, loose bolts in wood or metal, or any wobbles that weren't part of the design. If you built a bench, sit on it, bounce a little – gently at first, obviously. Imagine the forces it will face under load and try to replicate them safely. A failure here isn't just annoying; it could mean a trip to the ER.
Ongoing Care: Regular Maintenance is Non-Negotiable
Building it is only half the battle. Keeping your gear safe means checking it regularly. Think of it like checking the tires on your car, but if your tires failed, you might drop a few hundred pounds on your head. For wooden equipment, look for splits, rot, or signs of insect damage. Tighten bolts and screws periodically – wood expands and contracts, and things loosen up. For metal builds, check for rust, especially around welds or bolted joints. Ensure any moving parts, like pulleys on a cable system, are clean and lubricated if necessary. This isn't overkill; it's just common sense when you're literally putting your bodyweight, plus added weight, on something you built yourself. Staying on top of Beyond the Build: Safety and Maintenance for Your Homemade Gear prevents small issues from becoming catastrophic failures.
What should you look for during regular inspections?
- Loose bolts, nuts, or screws
- Cracks or splits in wood
- Rust or corrosion on metal parts
- Wear and tear on ropes, cables, or straps
- Signs of structural fatigue or bending
- Wobbles or instability under light load
Know Your Limits: Equipment and Personal
You built this beast, and that’s awesome. But every piece of equipment, especially homemade gear, has a limit. Do not guess the weight capacity of your squat rack or bench. If you used plans, stick to the recommended limits. If you freestyled, be conservative. Start light and gradually increase the weight, watching and listening for any signs of stress – creaking, bending, or shifting. This also goes for your own limits. Don't attempt a max lift on a piece of equipment you just finished building yesterday. Get a feel for it. Use spotters when necessary, even with homemade gear. Your DIY setup is a tool to help you get stronger, not a test of whether your carpentry skills can withstand gravity and poor judgment simultaneously.
Your Homemade Gym Awaits: Final Thoughts
So, there you have it. Building your own gym equipment at home isn't some pipe dream for hardcore welders or master carpenters. It's a practical way to get the gear you need without taking out a second mortgage. We’ve covered projects from simple concrete weights to more complex builds, proving that a functional, effective home gym is well within reach for most people willing to put in the work. You save cash, yes, but you also gain a setup that fits your space and your specific training goals like a glove. It might take a bit longer than clicking 'add to cart,' and sure, your DIY dumbbells might not have that shiny chrome finish, but they'll lift just the same. Now go build something solid and get after those goals.